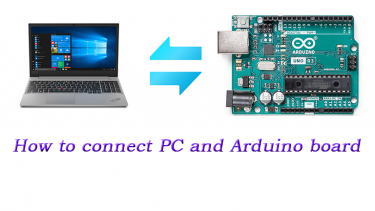
How to connect Arduino board with PC
Here I explain how to connect your arduino board to pc to send your program to the arduino board.
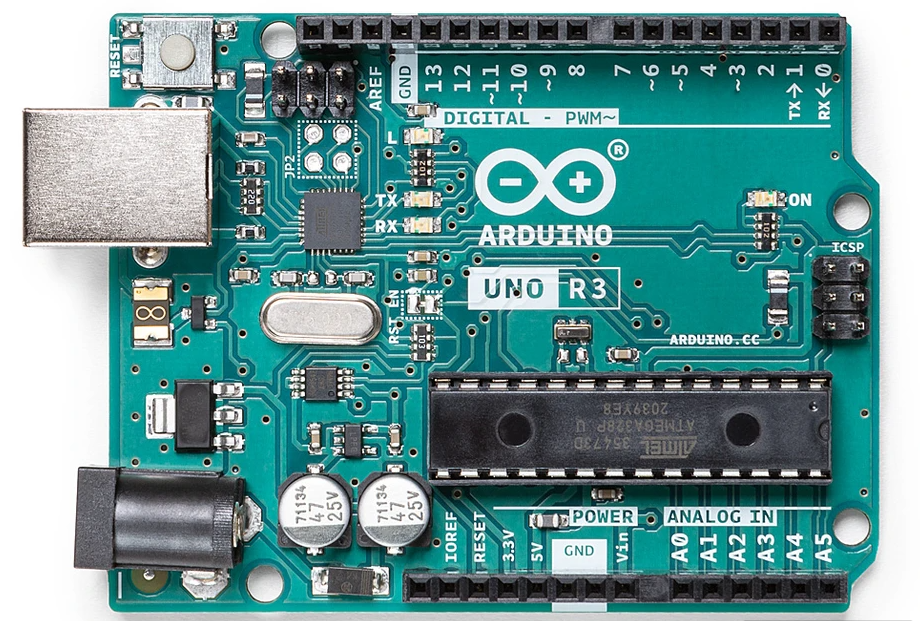
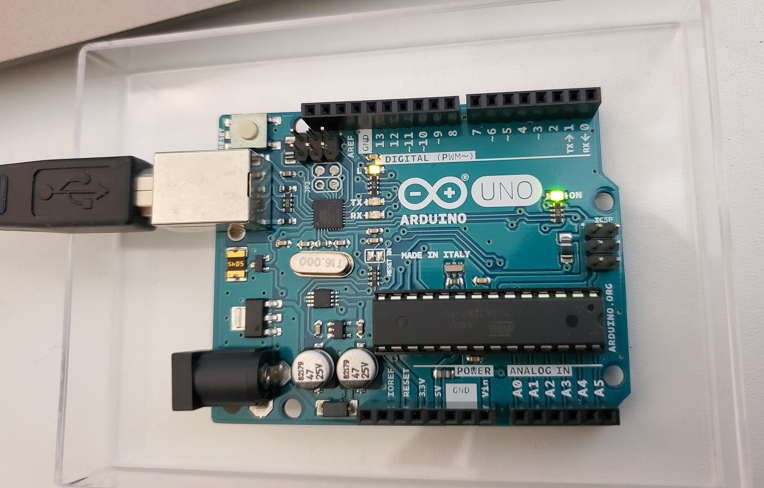
1.Choose and get your favorite Arduino board like Arduino UNO.
Arduino UNO is recommended to firstly start with Arduino.
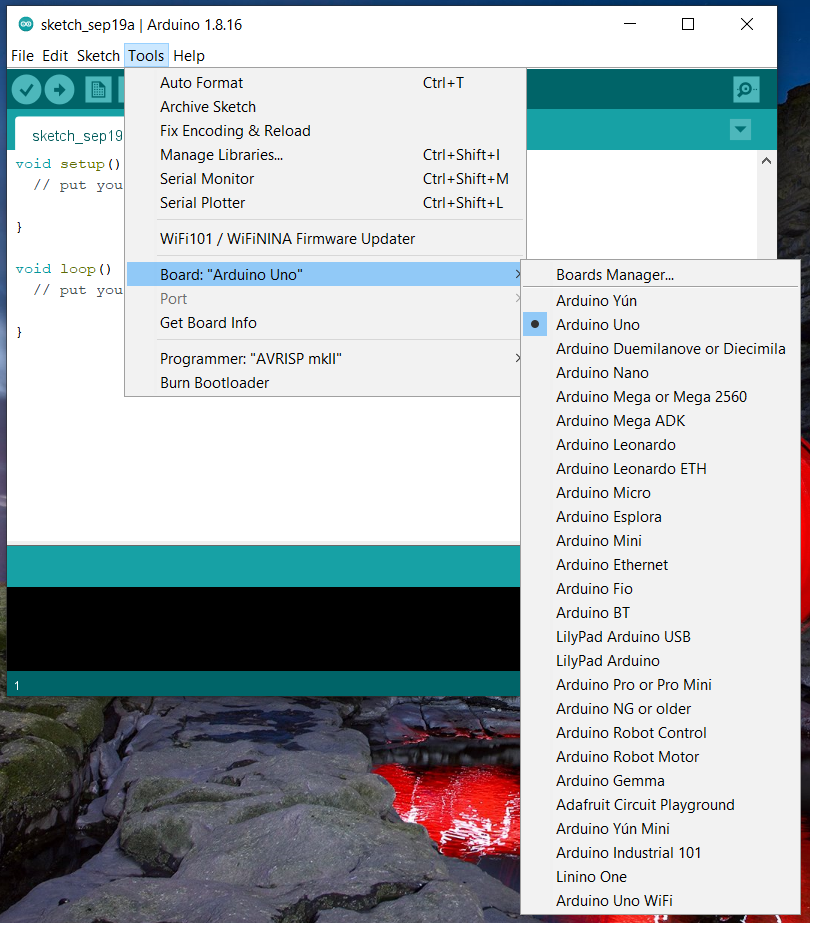
2. Open Arduino IDE.
Click “Tools” then, Choose a board name from board list on the right.
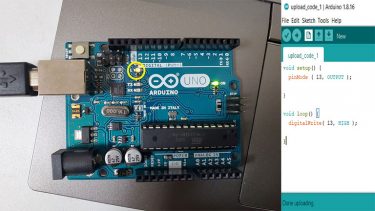
3. A program you create in Arduino IDE is sent to your board through “serial communication”.
// you can also refer to the page below to know more about serial communication on Arduino boards.
https://www.arduino.cc/en/reference/serial>
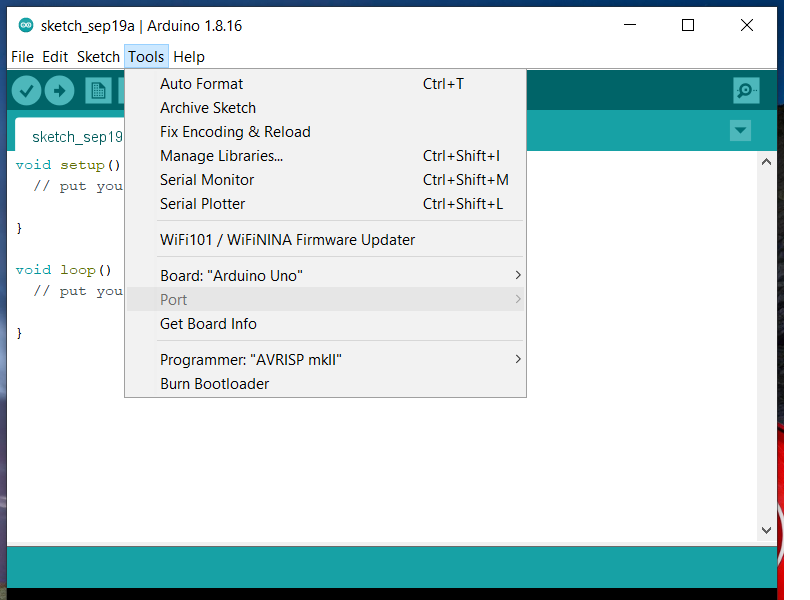
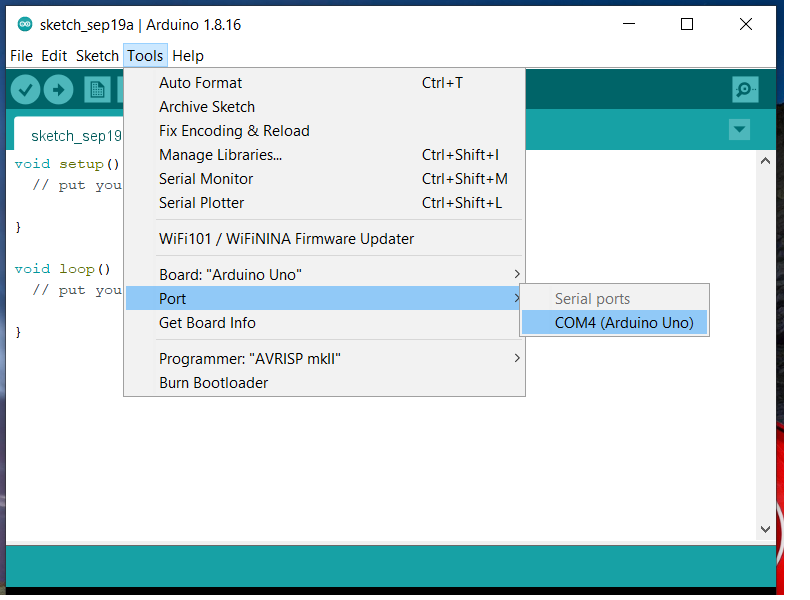
To enable this, you need to set serial port in Arduino IDE.
Open “Tool” , then, now “Port” is grayed out if you do not connect your Arduino board with PC.
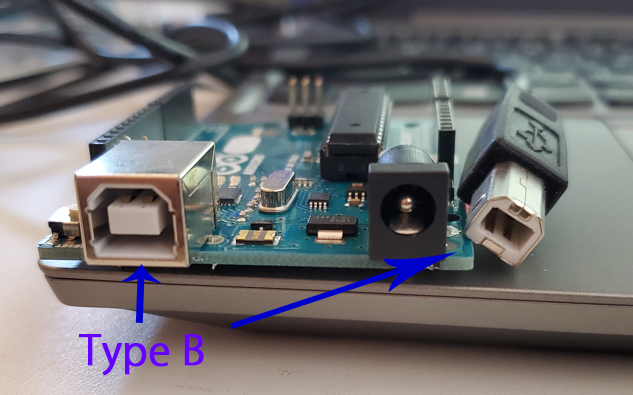
Then, Connect your Arduino board with PC using USB cable.
This USB cable is type A/B. PC side is type A. Arduino board side is type B.
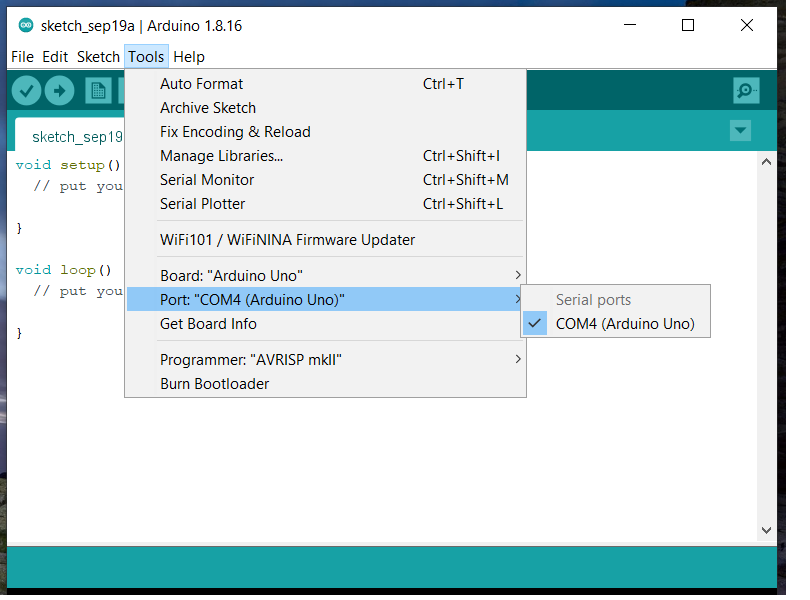
4. After connecting your Arduino board and PC, “Port” becomes active and you will be able to choose a port you can use on your PC.
Now you are ready to send your program to the arduino board!
In the next article, we will learn how to use Arduino IDE to write program and send it to your arduino board.